Friday, January 26, 2018

Home Roasting Coffee in a Cast Iron Dutch Oven


I recently started roasting my own coffee.  It is a very simple process, actually, and takes less than 30 minutes start to finish.  I roast  to just before the seconf crack, a blonder roast that many, and to my tastes, this produces a superior smooth cup of cofee.  Here is how I do it.

Ingredients & Tools:

2 cups Green Coffee Beans - approximately 3/4 of a pound
1 large cast iron Dutch Oven - I use a 10 qt lodge, others use a skillet.  A Dutch Oven contains the mess that the crackings make, that the skillet just can't.
1 whisk
1 Colander
1 gallon zip lock bag - or other air tight container.

Directions:

Heat your Dutch oven over medium high heat - I set my gas burner at level 6.

Once the pot is hot, pur in your two cups of beans and start whisking.  Don't stop whisking.

At about 4 minutes you will start to see a little brown on some of the beans, and a little of the roasting aroma.  Turn on your exhaust fan at this point.

At 8 minutes many more beans will be brown, there will be more aroma, and you will start to see the chaff among the beans.

At 12 minutes there will be pretty consistant medium browning of the beans, a good roasting aroma, lots of chaff, and maybe the first sounds of cracking.

At 16 minutes the first cracking should be getting in full swing and the beans starting to turn darker brown.  

At this point it becomes a matter of personal taste.  Soon the beans will start to seriously darken, and the second cracking take place - at about 20 minutes

I usually stop around 18 minutes, as I like the flavor of that roast.  You can go on past the second crack to a very deeply browned Aspresso roast, if you like.

No mater what roast you like, when it gets there, dump the hot beans into a collander, and keep whisking.

Now the whisking is cooling the beans, and breaking off the chaff, which then goes through the collander holes to whatever surface is below - I prefer a sink for easy cleanup.

Keep whisking for 5 to 7, or more, minutes, or until the beans cool to be able to toush them.

At that point, I dump them in a zip lock bag, press out as much air as I can, seal it, and let the beans sit on the counter.

Beans should rest, and are best, at least 12 hours, and probably 24 hours, after roasting.

Hear is a video I took of my most recent roasting.


Friday, June 2, 2017

Perfect Steak in a Cast-Iron Skillet


Serves: 2


Ingredients:


2 steaks - cut of your choice 

Coarse sea salt & coarsely ground black pepper, to taste

1/4 cup cooking oil

2 tablespoons of butter


Directions:


  1. Pre-heat the oven to 450 degrees. Add the 2 tbsp of cooking oil to a seasoned cast-iron skillet and place it in the oven to preheat too. 
  2. Remove steaks from the fridge and season both sides with coarse sea salt (or kosher salt) and coarsely ground black pepper, to taste. Just eyeball the spices, but make sure you use enough to form a nice crust. If you have a favorite meat seasoning blend, you can also use that. Let the steaks rest 30-45 minutes on the counter prior to cooking so the meat comes closer to room temperature. 
  3. Remove the pan from the oven on completion of preheat. Use an oven mitt as the pan will be VERY HOT. 
  4. Place preheated skillet on a burner set at medium high. This evenly heated skillet is required in order to create a proper sear on both sides of the steak. You may want to remove the batteries from your smoke alarm temporarily, turn on a ceiling fan and/or open a few windows
  5. Place steaks into the hot pan (it should sizzle). Make sure not to crowd the pan. If you're cooking more than 2 or 3 steaks you may need to use two pans. 
  6. Let the steaks cook for 3 minutes. Flip the steaks over, then let them cook another 3 minutes. I recommend using a timer here
  7. If you want to sear the sides, cook them for about 30 seconds on each side using your tongs to hold up each steak. 
  8. Using an oven mitt, again, transfer the pan into the oven and let it cook for 5 more minutes. This will create a medium center. If you want it medium rare or rare, try 4 minutes. IMPORTANT: For smaller, leaner steaks you'll want to keep it in the oven no longer than 2 minutes, even less if you want to achieve medium rare. For a larger, fattier cuts, 4-6 minutes will achieve a pink center. 
  9. Remove pan from the oven. Using tongs, place the steaks on a cutting board or plate, cover loosely with aluminum foil or a dish towel and let rest for 7-10 minutes without cutting into it.
  10. A few minutes before serving, when you plate the meat, top each steak with a tablespoon of butter. Give it a minute to melt over the steak, then serve.
  11. Optionally, before serving, you can sprinkle fleur de sel (it's a top-quality French finishing salt) over the buttery steak. 


Monday, January 14, 2013

Our Hot Hawai'ian Pizza (796 calories per half pizza)

As I've said before, I love pizza.  As I've also said before, the Carryout and Take-&-Bake are practically salt licks.  They taste delicious, often, but, they will make you spend the rest of the night guzzling water.  The ONLY way around this is to make your own, so you can control everything that goes into it.

Out here, in the Fresno, California area, we have a pretty good, if not grammatically challenged, local chain, called, "Me 'N Eds."  They make tasty pizza, for the most part, though overly salty, IMHO.  One of our favorites, is their "Hot Hawai'ian" pizza.  It has chicken, pineapple, cheese, ranch, and BBQ sauce, to name a few.  It is, frankly, delicious.  Kasi and I decided to make our own.

First, place a pizza stone in your oven, or on your grill, and preheat the oven or grill to 400 degrees.

Using the Olive Oil Dough we wrote about here, we rolled our pizza dough out on a floured surface, to a rough 16" round.


We then transfered it to our pizza peel, covered in cornmeal (to enable it to slide onto our pizza stone easier), and rolled up the edges to create a nice crust edge to hold on to, and give a border to any sauce used.  In this case we laid out a layer of Light Buttermilk Ranch Dressing as a sauce.


On top of the sauce we distributed, evenly, sliced mushrooms and red onions.


Some cooked and diced boneless chicken breast.


Then added shredded mozzarella cheese.


A smattering of pineapple chunks and jalapeno slices.


Crisscrossed the top with Sweet Baby Ray's BBQ Sauce.


And then placed it directly on the preheated pizza stone, and baked it for 14 minutes.


I just love the way this pizza crust crisps up, and how the edges rise and bubble, and get crisp.  The pizza itself was delicious.  Sweet and tangy, with the bight of the jalapenos on every piece.

Enjoy!

Ingredients:

1 portion Olive Oil Bread Recipe
2 Tbs Light Buttermilk Ranch dressing
5 button mushrooms thinly sliced
1/3 cup red onion, thinly sliced
1/2 cup diced cooked chicken breast meat
1/2 cup diced pineapple chunks
1/4 cup pickled and sliced jalapenos
1/4 cup shredded mozzarella cheese
1/4 cup Sweet Baby Rays BBQ Sauce

One pizza feeds two people @ 796 calories for each half of a pizza.

Tuesday, January 8, 2013

LeKue Steam Case prepared Mustard Encrusted Tilapia Filet

Some of you may know that one of my day jobs is selling cookware for Sur La Table's fresno store,  In the last two weeks we started selling a very interesting new line of products by LeKue.  These products are manufactured from 100% Platinum Silicone, a medicinal grade of silicone, and are BPA free.  They claim they will cook efficiently in the microwave, or, in the oven, placed on a middle rack.  Needless to say, I was intrigued.  I purchased the 1 quart "Steam Case with tray."  It comes with a few recipes, and I decided to try a fish filet in the microwave.

Out of the box it looks like this, green, with two wing like covers, and a clear silicone tray in the middle.  I took a frozen Tilapia filet from the freezer and let it defrost along side the steam case.


I removed the tray to get ready to cook.


I poured a little balsamic vinegar in the bottom of the steam case (their recipe called for white wine, which might have worked better, but I didn't have any) and added 3 peeled garlic cloves.


I replaced the tray, over the vinegar and garlic, to wold the filet.


I added the defrosted filet, and added salt & pepper, like their recipe suggested.


Their recipe called for spreading "Ancient Grain Mustard" on top, but I don't have any handy.  I chose to use my Guinness Stout Mustard, that I told you how to make in a blog post, here.


Then, I closed the wings, put it in the microwave, and cooked it for the 5 minutes the recipe called for.


During the 5 minutes of cooking there were some ominous popping and gurgling noises coming from the microwave, but there were some delicious aromas emanating as well, so I let it run, assuming it was the mustard seeds exploding.  I removed it from the microwave and placed it on the counter, opened its wings, and admired the finished product.


I removed it from the steam case, placed it on a plate, and poured the balsamic vinegar and garlic cloves over the top.


The nicest thing is that clean up is simple.  I just threw it in the sink, rinsed it a little, and placed it in the dishwasher - and it came out perfect.


As for the food itself, it was, for the most part, perfectly cooked and delicious.  My only complaint was there was a hard crust that formed on one edge of the filet.  The center, and the other 80% of the filet was cooked perfectly, but there was a tough portion.

Was that a function of the filet, not enough liquid, or now an even spread of the mustard, it is hard to tell without further attempts.  It was tasty, efficient, with minimal prep or clean up, and that is hard to argue with.

I will keep using it, and consider the other pieces in the line as well - the steamer pot insert, a silicone cooking pot, and a 1.5 quart steam case, designed to cook 3-4 servings.

It is an excellent product when you are in a hurry, for sure, or when you are slightly ill, and lazy, like I am right now.  :)

Enjoy!
 Ingredients:

1 6oz Tilapia Filet
3 Tbs Balsamic Vinegar
3 cloves Garlic
3 Tbs Whole Grain Mustard

Serves 1 by itself, or two with a salad and a starch.  I'd suggest Couscous.

Friday, January 4, 2013

One again, I'm back.

I started this blog in mid July, when I weighed 272 pounds (I now weigh 222 pounds, and was down to 218 twice during the Thanksgiving to New Years holidays).  It wasn't the heaviest I'd been - that was about 305, in the late 1980's, but it was far more than was healthy for me.  I was determined to lose the weight.

I graduated high school in 1974 as a skinny guy, 6' tall and 180 pounds.  From there it was a slow, but steady up, with a few diet downs along the way - classic yoyo action from fad diets, and silly exercise strategies.  I never once tried counting calories.

When I started this weight loss journey, I began with a three day juice cleanse.  I lost 8 pounds during the cleanse, felt 100% better, and was convinced of two things; juicing is hard, and I still wanted to lose more.  My girlfriend, Kasi, suggested that we try counting calories using the MyFitnessPal website and app.  I agreed to try it.

I set the system's parameters up to reach 225 pounds, while losing 2 pounds a week.  The app limited me to 1800 calories a day.  I decided I would take it very seriously and track as much as I could, and eat as well as I could.

I also decided that depriving myself was the quickest way to fail on my weight loss journey.  So, if I truly wanted something, I planned for it.  Pretty soon, I stopped wanting most treats, but I never stopped wanting chocolate.  I now eat a small amount of dark chocolate most evenings.

Anyway, on August 20th, my 56th birthday, I got a job as a line cook, making a lot of tasty, but not so healthy food.  It used up my blogging time, and my personal cooking time, and while the weight continued to come off, I don't feel the food was as healthy for me as I had been eating.

The line cook job is at a local university.  we are closed until Mid January, so I am turning my attention back here - and to my FoodieLite Facebook page (www.facebook.com/foodielite).

I am sick today, and not cooking, but hopefully soon, I will.

My new goal is 210 pounds.  I am only 12 pounds away, now, but I've changed the system's parameters to lose 1 pound a week, so now I am allowed 2350 calories a day.  Frankly I can't imagine eating that much every day, anymore.

It's time for round 2.  I hope you will choose to come along on this journey with me.

Thursday, August 16, 2012

Spicy Guinness Stout, and Caramelized Onion Mustard (19 calories per 1 tsp serving)

Growing up, my father loved good whole grain mustard.  He always had a good crock of Pommery Mustard, like this (Pommery Meaux Grain Mustard in Stone Jar), on hand.  He taught me to love good whole grain mustards.  Now, I make my own.


A good mustard, in my opinion, should have a good bite, be creamy, yet still show the mustard seeds, and have a sweet, but complex finish.  This Spicy Guinness Stout, and Caramelized Onion Mustard (recipe below) accomplishes all that goodness.  Nothing beats it on both a hearty burger, or a delicate piece of salmon.  Yum!

This mustard making process is a two day event, but it isn't as intense as that may sound.  Day 1 you caramelize a bunch of onions, and mix everything together, and then, you wait two days, and on Day 2, you process, or blend, everything.  Then you're done.

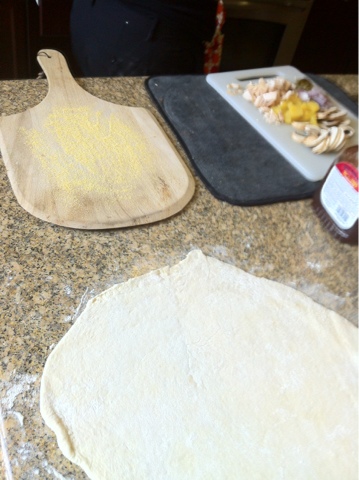
The first step is to caramelize a bunch of onions.  This process scares a lot of people, but it really is very easy, if time consuming, and gives you a treat you can use a number of different ways - with eggs, in a tart, on pizza, or in a salad, to name a few.

I used three larger yellow onions, to make about double the amount I needed for the mustard.  First, cut the top off of the onion, and then place the flat, cut, side down on your cutting board, and slice the onion in half, through the root end.  You want to keep the root intact, so it holds the onion together, making it easier to slice.


Place the larger sliced side down on the cutting board, slice the onion in half moons, fairly thinly, and place in a bowl.  Once you have sliced the onions, it is time to prepare your pan.

I like to use my well seasoned, 12" cast iron skillet for this task.  It's a good size, and since it is well seasoned, very little sticks to it.  Heat the skillet over medium high heat.  Once it is heated, add 1 TBS of unsalted butter, and then pour 1Tbs of decent olive oil over the top.  As the butter melts, swirl the pan to combine the two fats, and to coat the base of the skillet.

Now, add the onions.  They should immediately sizzle, and should fill the pan half to three quarters of the way up.


Let the onions sizzle for a couple of minutes, then using a large turner, begin the process of turning the onions over.  For the next 10-12 minutes, you will need to turn the the onions every couple of minutes, so they continue to sweat, and cook down, browning all the time.

After about 15 minutes, the onions will be reduced by about a half, in terms of volume in the skillet, and look somewhat browned, like the picture to the right.  At this point, sprinkle a little salt, and a little sugar over them, and toss them in the pan to mix them up.  The salt will draw out more of the moisture, and the sugar will add a little sweetness, but the onions will create their own sweetness as they caramelize, so just a dash or two is needed.

At this point you might have some fond (burnt, tasty, bits, stuck to the bottom of the pan), so pour about 2 Tbs of white wine vinegar into the pan, to deglaze (free up the fond) the pan, scraping and turning the onions as the vinegar bubbles and steams.  When the bubbling subsides, turn the heat down to medium, and continue cooking and turning the onions for at least 15 more minutes, but up to 30 more minutes, depending on how caramelized you like them.  I cooked mine about 22 more minutes.


Move the onions to a bowl, and let them cool about 30 minutes.


After the onions are cooled, it is time to start making the mustard.  This is actually the easy part.  I made it harder than I had to, because I wanted to discern how much of the caramel onions I wanted to include.


So, I started with a large (16 oz) canning jar, and poured in 1/2 cup of mustard seeds, and added a 1/4 cup of caramelized onions, then repeated the process, and ended up with the final 1/2 cup of mustard seeds on top. I then poured 6 oz of Guinness Stout over the seeds and onions, to see what it looked like.  This effort was interesting, to me, but completely unnecessary for the mustard making process.


So, I decided I should approach the process the correct way.  I  got out a medium bowl, and added the red wine vinegar, and the remaining 6 oz of Guinness Stout (remember, poor the Stout slowly and evenly, as a foamy head, here, is not helpful).  To that I added the salt (which bubbled impressively), and then the rest of the seasonings, and whisked it together.  Finally, I dumped my jar full of seeds, Stout, and onions, in (carefully, so as not to splash), and stirred them to mix them together.


At this time, cover the bowl with plastic wrap and put aside on the counter, and leave it alone for 2 days.

After 2 days, the seeds should have soaked up the Stout and the vinegar enough so you can stand a heavy spoon up in it.  It kind of looks like my granite countertops, doesn't it?  :)


Now, this is easiest done in a larger food processor, but I imagine it can also be done, possibly in batches, in a good blender, as well.


Dump the mixture into your food processor.  Once the mixture is all in, pulse it a couple of times, and then, using a spatula, wipe down the sides, and then let the food processor run for about 2 minutes.  As it runs, the mixture will thicken.  If 2 minutes isn't thick enough for your tastes, let it run longer.  This is your Mustard, after all.


I was happy with mine after 2 minutes.  This is the consistency, and thickness, I ended up with.


Enjoy!

Spicy Guinness Mustard


1 & ½ cups    Guinness Stout
1 & ½ cups    Yellow mustard seeds (about 10 oz.)
½ Cup            Caramelized onions
1 cup              Red wine vinegar
1 Tbs              Salt
1 tsp                Black pepper
¼ tsp               Ground cinnamon
¼ tsp               Ground cloves
¼ tsp               Ground nutmeg
¼ tsp               Ground allspice
¼ tsp               Ground ginger

(Makes about 3 & ½ cups of mustard)

Pour the Guinness Stout into a medium-sized, non-reactive, bowl.  Add the red wine vinegar to the bowl.
Add the onions, salt, pepper, and all the spices, and whisk together gently. Add in the mustard seeds, and whisk to incorporate.

Cover the bowl with plastic wrap, and set it aside on your counter.  Let it sit, undisturbed, for two days. This is so the seeds can soften up a bit, so you can process them easier.

After two days, your mustard seeds should have soaked up a lot of the liquid. Toss the contents of your bowl into a food processor, or do it in smaller batches in a blender.

Process the mustard mixture for about 3 minutes.

As the seeds break down, the mixture will get thicker. Scrape down the sides of the bowl, if need be.
Stop a few times to check the thickness. When you’re happy with how thick it is, stop.

Spoon the mustard out into prepared (i.e. very clean) jars or a bowl. Keep the mustard in the fridge. It’ll be good for about six months. That is, if you don’t eat it all sooner.

Wednesday, August 15, 2012

Making Focaccia with the Olive Oil Dough Recipe (171 Calories per serving)

I love pizza, but I hate the amount of salt put in carry-out, and take-and-bake, pizza.  I always wake up in the middle of the night, desperate for water, and wondering which salt lick I fell asleep against.  Man, it is awful, and truly unnecessary.

On top of that, add in all the processed garbage in the pizza, from the dough, to the sauce, to the variety of toppings, and no one knows what's really in those Frankenstein's monster of a pizza.

So, Kasi and I started making our own pizzas with the Olive Oil Dough (recipe here) for the crust, and the Big Sur Bakery & Restaurant Pasta Sauce (recipe here), as our pizza sauce.  We've been making a lot of these recently, including one I'll post about soon, but I, at least, am getting a little burned out, despite how ridiculously delicious they are.

So, I decided to try and make some basic Focaccia Bread (see recipe below) with the dough recipe.

I knew I wanted to top the Focaccia with onions, rosemary, and salt and pepper.  I had read that you need to saute the onions a little, to soften them first, or they will burn in the oven.  So, I sliced a quarter of an onion very thinly, and sauteed it in a tsp of olive oil, for less than 5 minutes - just until they softened, but didn't brown - and then setting them aside to cool.

Preheat your oven to 400 degrees.

I then started preparing the Focaccia dough by taking the last quarter (1 serving) of the dough I had made, and refrigerated, last week, and sprinkled it with flour, placed it on a floured surface, and then formed it into a ball.  To form the ball, gently pull the dough between your hands, and tuck the ends in at the bottom.  Next, turn the dough a quarter of a turn, and repeat.  Continue doing this 4 or 5 times, until the top is smooth and elastic.

Place the ball back down on your surface, cover it, and let it rest for about 10 minutes.  After it has rested, press the ball flat with the bare palm of your hand.  Next, roll the tough out to about a half an inch thickness.

Place a piece of parchment paper on a cookie sheet, and place the rolled out dough in the middle of the cookie sheet.

Now, with a small fork lightly prick the surface of the dough all over.
Now is the time the toppings can be added.  Start with a light coating of the sauteed onion, leaving a small border around the edge, then sprinkle on the fresh rosemary, and dust it with some freshly ground pepper.

Next, sprinkle on some salt. I have some artisan salts that I like to use,  One is a Black Cyprus Sea Salt Flakes, and the other is a white, pyramid shaped, Bali Sea Salt.  My pink Himalayan salt is too finely ground to use on this, but I wish I had some coarse ground, because the pink would totally pop next to the black flake salt.

Finally drizzle a little, about 1 Tbs, of olive oil over the top, cover, and let the dough rise about 10 minutes.

After the 10 minutes of rising has passed, pop the dough into the oven for 15 minutes, and sit back and enjoy the smells.

After 15 minutes, remove the Focaccia from the oven, and let cool about 20 minutes before slicing.

Eat, and enjoy!


Focaccia Bread


Ingredients:

1 serving           Olive Oil Dough (recipe here)
1/4                    Onion, thinly sliced, & sauteed until soft
1 tsp                 Extra Virgin Olive Oil
1 Tbs                Rosemary, fresh
To Taste           Coarse Salt
To Taste           Black Pepper, freshly ground
Drizzle              Extra Virgin Olive Oil